
The time of installation of a new air conditioning system is very exciting. It will imply that your home will be cool and more comfortable shortly before the hot summer season. Only a few individuals are uncertain about how to install it. People are asking themselves how many days it will last, how it works, and what they should do.
The positive fact is that AC installation is easy when conducted by experts. To make it clear, here is how to get an idea of what you will experience in an AC installation. This will make you feel sufficiently prepared and confident on the big day.
Step 1: Initial Consultation and Planning
The process starts with a first consultation. A technician will also visit your residence to learn about your cooling requirements. They will examine the size of the rooms, what system you have (or had), and how much energy you need.
At this stage, you will also discuss the kind of AC that will best suit your home. It may be a split type, ductless mini-split, or a central system. The technician will propose what suits you based on available space, budget, and comfort.
The need to plan is justified by the fact that the correct AC will be efficient and will save money on energy bills in the long run.
Step 2: Preparing the Space
After selecting a system, the home to be installed has to be prepared and put in place. It implies freeing the site on which the indoor unit is going to be mounted. In case of outdoor units, the technicians will require an area around a wall or balcony.
If you have an existing machine to remove, the team will do so safely. They might also examine your electrical wiring and ensure that everything is set up for the new system. The preparation will prevent delays on installation day and make the process smooth.
Step 3: Delivery of Equipment
On the day of installation, the team will bring all the necessary equipment and parts, including the indoor and outdoor units, pipes, and wiring, among other tools. There is no reason to worry about buying something extra because the professionals do all the work.
They will also go through everything once again to ensure that the system has all that was agreed upon during the consultation.
Step 4: Installing the Indoor Unit
The initial big process is installing the indoor unit. In split and ductless systems, this unit is generally positioned high on a wall. The technicians will place it in the right position to achieve air circulation.
They will punch a little hole in the wall through which they will connect the indoor unit to the outdoor machine with pipes and electrical wires. After installation, the unit will be fixed up and tried out to ensure that it is sitting well and that it appears tidy within the four walls of your room.
Step 5: Installing the outdoor unit
The AC system comprises the outdoor unit, which is the heart of the system. Its compressor and condenser perform the major cooling functions.
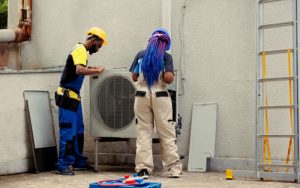
It is an outside unit, not inside your apartment or home, and is normally on a balcony, rooftop, or ground-floor location. Technicians ensure that it is well aired and has no obstructions from other objects or walls. The right location means that your air conditioner works effectively and saves on energy.
Step 6: Connecting the System
The next factor is the relationship between the indoor and outdoor units. Through the tiny hole in the wall, the technicians route refrigerant lines, electrical lines, and water drainage lines. All these connections are temporarily bonded together to prevent leaking.
This step might be time-consuming, as precision is vital. Inaccuracy at this point may interfere with the system’s performance.
Step 7: Electrical Setup
Once the system has been connected, the team moves on to the electrical setup. They connect the AC to the home’s power supply and ensure that it is up to date in terms of safety.
During the consultation, the technicians will inform you in advance of upgrading your electrical panel if it needs one. Then, after everything has been properly wired, they check the system with safety tests.
Step 8: Testing the AC
Now that everything is prepared, we can check the AC. The technicians will turn it on and monitor the flow of air, the cooling, and the accuracy of the thermostat.
They will also listen to or feel for any abnormal noises, vibrations, or leaks. Should they require this, they will make their adjustments on the spot. Testing will ensure that the system is working well before they leave your house.
Step 9: Final Walkthrough and Guidance
The technicians will go through the system with you before the task is completed. They will demonstrate how to operate the remote control or smart application, tell you about the maintenance recommendations, and answer possible questions.
Final Thoughts
Installation of a new AC is a pleasant and well-calculated process. From the initial consultation to the last test, every single compression can guarantee confidence, safety, and efficiency.
Being aware of what happens during the installation process will enable you to prepare your space, know the appropriate questions to ask, and feel secure during the process.
Thanks to professionals, your AC will be able to cool your house when the hottest days grip London. You can count on Airhive UK to carry out trusted installation, professional service, and ongoing maintenance. They not only ensure that their competent team installs everything but also that it withstands the test of time.
FAQs
- What happens during the initial assessment?
A technician evaluates your home, discusses your needs, and recommends the best AC system for you. - How long does the installation take?
Typically, installation takes a few hours to a full day, depending on the system and complexity. - Will I need to make any changes to my home?
Some installations may require modifications, such as electrical work or duct adjustments. - Do I need to be home during installation?
It’s recommended to be present, but you can discuss arrangements with the technician beforehand. - What should I do after installation?
Familiarize yourself with the system, schedule regular maintenance, and keep the area around the unit clear.